When Laying Tile Is it Approriate to Start in the Center of the Room?
One of the basic questions many homeowners have when beginning to lay a tile floor is where to start the layout. Theoretically, the tiles can be put down beginning at any area of the room, but beginning in corners, for instance, will often not lead to a balanced installation. The center of the room offers a logical area to begin some tile installations, such as diagonal tile patterns. In other cases, however, you would choose another starting point.
Multiple-Piece Tile Patterns
Frequently the floor tiles being laid have more than one size of tile arranged in a pattern. The patterns may contain two, three, four or five differently shaped and sized tiles that follow a repeating sequence across the floor. Nearly all multiple-pieced tile patterns begin in the left-hand corner of the room farthest from where you enter the door. Most of the tiles will need to be cut to fit the perimeter of the room; starting in a corner allows you to begin the pattern with full tiles on a straight line and move evenly into the room. In this case, beginning in the center may make it more difficult to get the pattern moving evenly.
Diagonal Tile Layouts
Diagonal tile patterns almost always begin in the center or near the center of the room. To lay out a diagonal pattern, snap a line from one corner to the opposite. Measure the line and find its center point. Snap a second chalk line 90 degrees to the first at the center point. This will divide the room into four sections. Lay the tiles along one of these lines first, starting in the center of the room, then along the intersecting line. Fill in the quadrants next and finally the edges of the room.
Tile Within a Tile Pattern
Sometimes a different colored tile is set in the middle of the room as a focal point, medallion or “rug.” A surrounding border often divides these tiles from the field tiles that fill in the rest of the room. Lay out and install these decorative center tiles and their border first, and then install field tiles. To ensure the field tiles have full tiles next to the decorative area, with cut tiles around the perimeter of the room, the field tiles are laid from the decorative area out to the walls — that is, from the center of the room outward.
Easy DIY Tiling Tips for Amateurs
Adding tile to your home is a great way to update the look of a space. Whether you are tiling an entryway floor, adding a little color to your kitchen with a backsplash, or tackling a total bathroom renovation, installing the tile yourself is nothing to be afraid of. With the right tools and a carefully laid-out plan, you’ll be amazed at what you can accomplish. Just follow these simple steps for a do-it-yourself tiling project you’re sure to love.
1. First, you’ll need to know how much tile you’ll need, so carefully measure your space and determine the square footage. Because tiles come in various sizes, the overall square footage is essential to purchasing the right amount. Order an extra ten percent to account for any cuts or mistakes.
2. For best results, install backer-board (waterproof if it’s in a bathroom) to the surface that you will be tiling; it provides a smooth, even surface for better tile adhesion. Use a light coat of glue or tile adhesive (ask your tile supplier whether mastic or mortar will work best for you) and screws to affix it to the walls. If you are tiling a floor, roll out a waterproof underlay (available at home improvement stores) to cover the entire area that will be tiled.
3. Find the center of the area to be tiled and, using a level, draw one line horizontally and one line vertically to create quadrants of the area you’re tiling.
4. Once you have your tile design determined (try to avoid too many cuts and be aware of keeping the design centered), start at the center of the area you marked, and spread the tile adhesive onto the backer-board into one of the quadrants in ten-square-foot sections using a notched trowel. Continue to spread the adhesive until it is even and the notches are apparent as they help the tile adhere to the wall.
5. At the center point of the quadrant, begin laying the tiles horizontally, applying gentle pressure to push the tiles into the adhesive. For best results, place tile spacers in between each tile for an even layout. Use a level or A-square to ensure that the tiles are straight. Continue adding adhesive and tiles, working toward the outer edge of the tile area.
6. For tile pieces that are too big, use a snap cutter or wet saw to make straight cuts. If a tile needs to be notched or have a center piece cut out to accommodate an outlet, use a wet saw, being careful not to cut beyond the required opening.
7. Let the tile sit overnight. Next, using a trowel, apply the grout to the tile, working from one corner to the opposite side of the space. Be sure to apply the grout liberally and evenly, making sure that it really fills in the gaps between all of the tiles.
8. Allow the grout to dry for 30 minutes. Once dry, wash away the excess grout with a clean sponge.
9. For best results, apply a tile sealant to prevent the grout from being stained or becoming subject to moisture.
Prepare Your Bathroom for Tiling
The quality of your bathroom tiling is strongly influenced by the state of the surface you tile over, so it’s important to ensure that your bathroom walls and floor are sound, level and clean of dust and debris before you start tiling.
Most bathroom floor surfaces are likely to be concrete or timber. Plasterboard is common for walls.
Concrete
If the concrete is new, it must be allowed to cure for at least 28 days before it’s tiled over. If the concrete is steel-trowelled, it will need to be mechanically roughened (and then thoroughly cleaned) prior to tiling. Otherwise, you will not get enough adhesion.
Any concrete release agents and curing compounds should be removed by mechanical means. If the concrete has cracks larger than 1.5mm, consult your local suppliers for advice before proceeding.
Timber
Because timber naturally expands and contracts, we don’t recommend adhering tiles directly onto timber floors. Untreated floors should be primed and allowed to dry before tiling.
Plasterboard
Plasterboard is a very common indoor wall surface, but it needs to be waterproofed before being tiled over. Tiling over plasterboard involved adhering tiles to a paper surface. Although this will cause no issues in dry areas, without waterproofing moisture can cause it to deteriorate.
Prime the Surface for Tiling
Before you start tiling, prepare the surfaces to be tiled by applying a primer using a roller or sponge. We recommend using a water-based primer like Ardex MultiPrime.

Cover up an old floor
Whether you’re replacing an old shabby bathroom flooring tile or installing a new one, you can’t beat ceramic or stone tile for durability and appearance. When laid properly, it’s virtually a forever floor tiling that requires almost no care and maintenance. And you can select materials from a vast array of colors and textures. We’ll cover how to install tile in a few steps.
What’s equally attractive is that you can lay a first-class tile floor yourself, often in one weekend, and save the $500 to $1,500 cost of hiring a pro.
The key to keeping the how to tile a floor job simple is to cover the old vinyl or other flooring with a new thin underlayment that gives you a fresh, clean start. No messy tear-out and repair. In this article, we’ll demonstrate how to install a thin “backer board” over the old floor tiling. Then we’ll cover tile-setting techniques, from layout and cutting to grout and cleanup.
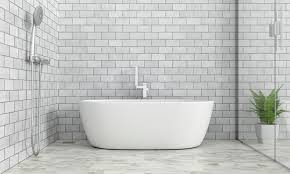
Tile extends beyond tub
Plan the tile layout so a column of tile extends past the end of the tub. Use the method shown in the “Mock up and measure” photo above to determine how wide the corner tile needs to be in order to extend the tile beyond the tub. Plan to extend the tile 2 or 3 in. beyond the tub and to leave at least a half tile along the wall if possible.
Don’t stop tile even with the end of the tub. This leaves the walls along the front of the tub vulnerable to water damage, and doesn’t look as finished as tile extending to the floor. Get more tips on how to lay out tile here.
Required Tools for this Project
Have the necessary tools for this DIY project lined up before you start—you’ll save time and frustration.
- Level
- Line level
- Tape measure
Required Materials for this Project
Avoid last-minute shopping trips by having all your materials ready ahead of time. Here’s a list.
- Tile (regular and wider)
- Tile spacers