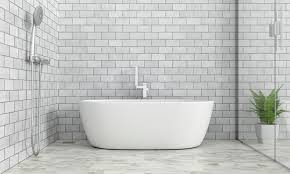
Kitchen Faucet That Save You Water

Kitchen Faucets

At home, the kitchen is one area to really pay attention to. This is where homeowners find themselves dishwashing, preparing ingredients, cooking countless meals, and storing food and supplies. It’s where family and friends gather, and where you can showcase your style while also focusing on practicality and function. One of the very most important things to find when putting together or remodeling a kitchen is the best kitchen faucet.

Finding the best kitchen faucets available can be a challenge. There are features to consider that separate the special faucets from the more mediocre ones. You have to see which brands invest in quality materials for their kitchen faucets, and how well these brands have been reviewed, before choosing to invest in them

So, what should you consider when finding the best kitchen faucet you can? Think about the material, function, certifications, and warranty, among other factors. Checking the material is really important, as it can spell the difference between a long-lasting kitchen faucet and one that breaks down after a few months. The functions of the product should also be considered so that you’ll maximize your kitchen faucet usage. Examples of these functions include extendable hoses or multiple spray functions. As for certifications, they’re proof that the brand has passed industry standards, be it for safe drinking, water-saving, or having eco-friendly materials. This guide should help you narrow the list of kitchen faucets worth buying.

This lets you turn the faucet on or off with a handwave so that you won’t have to manually turn the handle. This would come in handy during times when you have your hands filled with soap suds or grease. The MotionSense Wave can also help prevent children from turning on the faucet and playing with it. This feature would certainly appeal to families or buyers concerned with safety and ease of use.

Having a sprayer that lets you wash in different ways is useful because there are assorted objects that need washing or water any time. If you need to rinse fruits and vegetables, the spray function should be strong enough to clean them. If you need a glass of drinking water, the stream function should suffice. If you have dishes with morsels stuck on then, the blade sweep function can deliver a high-pressure flow to sweep the grease and dirt stuck on them.

In The Design Studio: All the Things You Never Knew About Kitchen Faucets

We spend hours selecting our cabinets, countertops, backsplash and even hardware, touching and feeling and making sure it’s just right. However, when it comes to faucets, the budget has been blown and everyone is exhausted making selections, yet there are so many of them to choose from.

Pull-down: Those are the larger goose neck type that has a sprayer that pulls down.

Pull-out: A bit more of a traditional faucet, lower to the sink with the spray pulling toward you, the clearance to the sink tends to be lower.

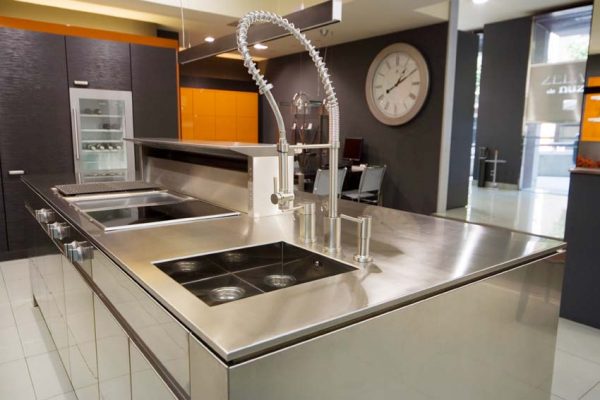
Commercial: Look of the large industrial faucets with a flexible hose for a sprayer. Those fit in a professional looking kitchen with modern touches. Pay attention to the size as they are big and can over power a small kitchen and a small sink.

Single handle: Some sort of a gooseneck with the spray on the side

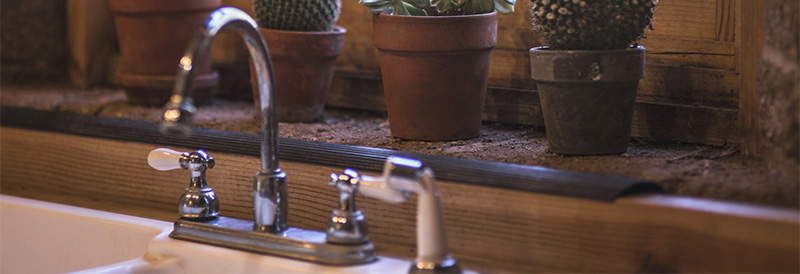
Two handles: Can be on the sides of the gooseneck of a very traditional bridge faucet. Those pair nicely with a farm sink to complete the look.

Motion sensors: Gaining popularity, as people do not want to touch the faucet with dirty hands, those come in handy as well when you have people with limited mobility at the house.

Pot filler: Normally installed above the stove for ease of use of filling large pot for pasta and soup without needing to move the pot across the kitchen.

Bar: Those are usually a smaller version of the pull down, but without the pull down. We use then often in the prep sink area and not just in a bar setting. Beware that they are smaller, so maybe too small for the kitchen sink.

There is nothing more annoying than a faucet that leaks after a few months of use, or a pull-down sprayer that no longer pushes back into place and now just hangs there, making the faucet look broken and ugly. Look for brand names you know, with warranty, and parts that can be easily replaced if needed. Look for metal parts and not plastic — those will break easily and the finish will fade fast. Make sure the internal cartridge is metal or ceramic; unfortunately, most faucets at the big box store and some outlets are plastic and those will break very fast.

Care: Single-handle tends to be the easiest, as you just have one big spout to wipe and done. The commercial style will be a bit of a pain because of the coil around the top, which makes it hard to clean under it. Material-wise, most are well made these days and should last a long while. Most manufacturers will warranty the finish for a lifetime.

When you are done with your dishes, give the sink and the faucet a quick wipe and you are done. Do not use materials that will scratch the finish. If there is grime or a limestone buildup, use baking soda or white vinegar on a toothbrush to clean it out. A daily clean will help avoid those. Always use ammonia, bleach and acid-free cleaners — this is a good rule for all our kitchen surfaces.

What to Look for in a New Kitchen Faucet

TOUCH CONTROLS

Have you been considering a faucet upgrade? Some of the newer faucets on the market are pretty handy! They have touch controls on them so that all you have to do to turn on the water is touch the faucet. This is helpful when you are cooking or cleaning and have messy hands. Some of them even have nicer spray heads with magnets on them so that you don’t have to worry about them coming loose and hanging down after spraying dishes or veggies

WHY YOU MAY WANT TO CONSIDER PAYING FOR QUALITY

We strongly suggest spending a little more money on a good faucet rather than the cheapest one. A better faucet will last longer and you’ll enjoy it more. You’ll have fewer problems with them and the warranties are much better.

Find the Best Kitchen Faucet

Hundreds of kitchen faucet styles, ranging from basic to posh, await your selection. We sorted the options to ensure you’ll get the best tap your budget will buy. Review these faucet buying guidelines to help you find the right model.

Thoughtfully chosen faucets add pizzazz to hardworking kitchens. In finishes from shiny chrome to antiqued bronze, faucets sporting either low-arc or gooseneck spouts provide sleek to vintage profiles and patinas that complement new and old-world looks.

Kitchen faucets are activated via one or two levers or two X-shape handles or round knobs and are offered in configurations that might include spouts equipped with pullout and pull-down sprays, side sprayers, and soap or lotion dispensers. Some faucets are equipped with sensors that turn water on and off with a touch of a hand.

Installation & Operation

Installation varies, though most faucets are attached through holes cut into the sink. A deck-plate faucet’s components are mounted on a single plate; other faucets’ components are individually installed in up to five holes. In cases where it’s difficult to cut holes in a sink deck, such as apron-style and undermount sinks, wall-mount faucets provide a stylish solution. When replacing a faucet, choose a model compatible with your sink’s existing cutouts. Buying a new sink allows you to customize the number of holes to fit your preferred faucet.

Forms & Finishes

Once you’ve determined faucet type, it’s time to consider form and finish. Bridge faucets, inspired by Victorian Era designs, connect the spout and handles on a raised bar; gooseneck or high-arc faucets stand tall to clean big pots; standard low-arch or straight-spout faucets work well with smaller sink setups. Check that the faucet is proportionate to your sink’s size and that the spout reaches as close to a sink’s center as possible. Remember that too-tall gooseneck faucets create unwanted splashes in too-shallow sinks, and low-arc faucets might need to be moved to accommodate cumbersome cooking gear

Types of Kitchen Faucets You should Know Before You Buy

With so many sizes and styles on the market, it can be difficult to choose a good faucet for your kitchen. So we’ve put together a list of the types of kitchen faucets to make your choice a little easier!

Single-Hole Faucets

The most common kind of kitchen faucet is the single-hole faucet. It’s named for the fact that you only need one hole in your countertop to install it, and its simplicity is also reflected in its design.

Centerset

Also known as “two-handle” or “two-hole” faucets, centerset faucets have separate handles for hot and cold water that flank the center sprout. As you might have guessed from the name, they’ll need multiple holes for installation.

Widespread

Widespread faucets are nearly identical to centerset faucets, but instead of having everything connected to a single base plate, widespread faucets come with individual pieces that are installed separately.

Pull-Out

Pull-out faucets are exactly what they sound like: Faucets that come with detachable heads that can be pulled closer to you with the help of a “hose” or “snake.”

Taking Care Of Your Marble Tile Flooring

When Laying Tile Is it Approriate to Start in the Center of the Room?

One of the basic questions many homeowners have when beginning to lay a tile floor is where to start the layout. Theoretically, the tiles can be put down beginning at any area of the room, but beginning in corners, for instance, will often not lead to a balanced installation. The center of the room offers a logical area to begin some tile installations, such as diagonal tile patterns. In other cases, however, you would choose another starting point.

Multiple-Piece Tile Patterns

Frequently the floor tiles being laid have more than one size of tile arranged in a pattern. The patterns may contain two, three, four or five differently shaped and sized tiles that follow a repeating sequence across the floor. Nearly all multiple-pieced tile patterns begin in the left-hand corner of the room farthest from where you enter the door. Most of the tiles will need to be cut to fit the perimeter of the room; starting in a corner allows you to begin the pattern with full tiles on a straight line and move evenly into the room. In this case, beginning in the center may make it more difficult to get the pattern moving evenly.

Diagonal Tile Layouts

Diagonal tile patterns almost always begin in the center or near the center of the room. To lay out a diagonal pattern, snap a line from one corner to the opposite. Measure the line and find its center point. Snap a second chalk line 90 degrees to the first at the center point. This will divide the room into four sections. Lay the tiles along one of these lines first, starting in the center of the room, then along the intersecting line. Fill in the quadrants next and finally the edges of the room.

Tile Within a Tile Pattern

Sometimes a different colored tile is set in the middle of the room as a focal point, medallion or “rug.” A surrounding border often divides these tiles from the field tiles that fill in the rest of the room. Lay out and install these decorative center tiles and their border first, and then install field tiles. To ensure the field tiles have full tiles next to the decorative area, with cut tiles around the perimeter of the room, the field tiles are laid from the decorative area out to the walls — that is, from the center of the room outward.

Easy DIY Tiling Tips for Amateurs

Adding tile to your home is a great way to update the look of a space. Whether you are tiling an entryway floor, adding a little color to your kitchen with a backsplash, or tackling a total bathroom renovation, installing the tile yourself is nothing to be afraid of. With the right tools and a carefully laid-out plan, you’ll be amazed at what you can accomplish. Just follow these simple steps for a do-it-yourself tiling project you’re sure to love.

1. First, you’ll need to know how much tile you’ll need, so carefully measure your space and determine the square footage. Because tiles come in various sizes, the overall square footage is essential to purchasing the right amount. Order an extra ten percent to account for any cuts or mistakes.

2. For best results, install backer-board (waterproof if it’s in a bathroom) to the surface that you will be tiling; it provides a smooth, even surface for better tile adhesion. Use a light coat of glue or tile adhesive (ask your tile supplier whether mastic or mortar will work best for you) and screws to affix it to the walls. If you are tiling a floor, roll out a waterproof underlay (available at home improvement stores) to cover the entire area that will be tiled.

3. Find the center of the area to be tiled and, using a level, draw one line horizontally and one line vertically to create quadrants of the area you’re tiling.

4. Once you have your tile design determined (try to avoid too many cuts and be aware of keeping the design centered), start at the center of the area you marked, and spread the tile adhesive onto the backer-board into one of the quadrants in ten-square-foot sections using a notched trowel. Continue to spread the adhesive until it is even and the notches are apparent as they help the tile adhere to the wall.

5. At the center point of the quadrant, begin laying the tiles horizontally, applying gentle pressure to push the tiles into the adhesive. For best results, place tile spacers in between each tile for an even layout. Use a level or A-square to ensure that the tiles are straight. Continue adding adhesive and tiles, working toward the outer edge of the tile area.

6. For tile pieces that are too big, use a snap cutter or wet saw to make straight cuts. If a tile needs to be notched or have a center piece cut out to accommodate an outlet, use a wet saw, being careful not to cut beyond the required opening.

7. Let the tile sit overnight. Next, using a trowel, apply the grout to the tile, working from one corner to the opposite side of the space. Be sure to apply the grout liberally and evenly, making sure that it really fills in the gaps between all of the tiles.

8. Allow the grout to dry for 30 minutes. Once dry, wash away the excess grout with a clean sponge.

9. For best results, apply a tile sealant to prevent the grout from being stained or becoming subject to moisture.

Prepare Your Bathroom for Tiling

The quality of your bathroom tiling is strongly influenced by the state of the surface you tile over, so it’s important to ensure that your bathroom walls and floor are sound, level and clean of dust and debris before you start tiling.

Most bathroom floor surfaces are likely to be concrete or timber. Plasterboard is common for walls.

Concrete

If the concrete is new, it must be allowed to cure for at least 28 days before it’s tiled over. If the concrete is steel-trowelled, it will need to be mechanically roughened (and then thoroughly cleaned) prior to tiling. Otherwise, you will not get enough adhesion.

Any concrete release agents and curing compounds should be removed by mechanical means. If the concrete has cracks larger than 1.5mm, consult your local suppliers for advice before proceeding.

Timber

Because timber naturally expands and contracts, we don’t recommend adhering tiles directly onto timber floors. Untreated floors should be primed and allowed to dry before tiling.

Plasterboard

Plasterboard is a very common indoor wall surface, but it needs to be waterproofed before being tiled over. Tiling over plasterboard involved adhering tiles to a paper surface. Although this will cause no issues in dry areas, without waterproofing moisture can cause it to deteriorate.

Prime the Surface for Tiling

Before you start tiling, prepare the surfaces to be tiled by applying a primer using a roller or sponge. We recommend using a water-based primer like Ardex MultiPrime.

Cover up an old floor

Whether you’re replacing an old shabby bathroom flooring tile or installing a new one, you can’t beat ceramic or stone tile for durability and appearance. When laid properly, it’s virtually a forever floor tiling that requires almost no care and maintenance. And you can select materials from a vast array of colors and textures. We’ll cover how to install tile in a few steps.

What’s equally attractive is that you can lay a first-class tile floor yourself, often in one weekend, and save the $500 to $1,500 cost of hiring a pro.

The key to keeping the how to tile a floor job simple is to cover the old vinyl or other flooring with a new thin underlayment that gives you a fresh, clean start. No messy tear-out and repair. In this article, we’ll demonstrate how to install a thin “backer board” over the old floor tiling. Then we’ll cover tile-setting techniques, from layout and cutting to grout and cleanup.

Tile extends beyond tub

Plan the tile layout so a column of tile extends past the end of the tub. Use the method shown in the “Mock up and measure” photo above to determine how wide the corner tile needs to be in order to extend the tile beyond the tub. Plan to extend the tile 2 or 3 in. beyond the tub and to leave at least a half tile along the wall if possible.

Don’t stop tile even with the end of the tub. This leaves the walls along the front of the tub vulnerable to water damage, and doesn’t look as finished as tile extending to the floor. Get more tips on how to lay out tile here.

Required Tools for this Project

Have the necessary tools for this DIY project lined up before you start—you’ll save time and frustration.

  • Level
  • Line level
  • Tape measure

Required Materials for this Project

Avoid last-minute shopping trips by having all your materials ready ahead of time. Here’s a list.

  • Tile (regular and wider)
  • Tile spacers

Roof Installation Works And Services

Roofing Contractor

Your roof is vital to protecting your home from the elements. In addition to keeping water out, your roof also protects your property from high winds, debris, and even fires. Keeping your roof in good condition is something that many homeowners struggle with as they don’t know what to do

Expert Residential Roof Repair

Too many people suffer the cost of a premature roof replacement. Neglected roofs are more likely to have repair problems and will wear out more quickly. This means you may find yourself replacing your roof at 7 to 10 years when it should have lasted between 15 and 20. If you are looking to get the most out of your existing roof, you will want to focus on keeping your roof well-maintained and in good repair. Scheduling seasonal inspections and making repairs as soon as possible is vital. By paying close attention to your roof and being aware of the signs of a repair issue, you can expect to enjoy your existing roof’s full lifespan.

Signs you need roof repair include:

Water staining inside your home, especially on ceilings, walls, and in your attic or crawlspace

Visible damage to your roof’s exterior, including loose or missing shingles and damaged or rusted flashing

Gutter problems, such as frequently clogged gutters, or gutters with holes and tears in them

Moss or plants growing on your roof

Wildlife roosting in your roof, attic, or crawlspace

Sagging spots on your roof, or areas that are collecting water

An unexplained increase in your heating or cooling costs

On average, a residential roof will last for around 15-20 years. Even the most well-maintained roof will require replacement at some point. This is because your roofing materials will degrade over time. Winds, rain, snow, temperature changes, and UV rays from the sun all contribute to the breaking down of your roofing materials.

Roofing Installation

Getting a new roof can be both exciting and overwhelming. Roof installation is a big project and represents a significant investment in your property. You want to be sure that the contractor you hire is professional, trained, and experienced. Whether you are working on a new construction project, remodeling your home, or replaced a damaged roof,

HAND NAILING VS NAIL GUN: WHICH ROOFING INSTALLATION METHOD IS BETTER

WHICH IS BEST FOR ROOF SHINGLE INSTALLATION – HAND NAILING OR NAIL GUN?

This question can be argued both ways and both can be correct. The simple answer is. It all depends on the man or woman holding the hammer or air gun and how they use it. Since asphalt shingled roofs are the most popular residential roofing materials used

Do-It-Yourself Roofing (DIY)

Most do-it-yourselfers will purchase their shingles and never think about how to fasten them to the roof. Most think that nailing the composition shingle with a hammer is the only way. Did you know there are tool rental stores the will rent air compressors and nail guns for your roofing project? Is it worth the money to rent?

Most professionals use pneumatic nail guns and air compressors. There must be a reason why. It is speed. A nail gun is a tool that has a magazine or tray that stores the fasteners. One by one these fasteners are driven through the asphalt shingle and into the roof deck by a supply of air.

A compressor needs to have a continuous supply of air pressure to do this, which is about 90 – 120 PSI depending on the nail gun in use, roofing products used, thickness of roof deck, and the temperature of the time of day. The fasteners should have enough power to drive a nail into the roof deck 3/4 of an inch or through it to meet manufactures specifications and local codes.

PROS AND CONS OF HAND NAILING AND NAIL GUN ROOFING

Speed without experience is not good thing. Using a fast nail gun can be dangerous and does not insure a good roof installation. I see it all the time. Nails not places correctly WILL cause roof failures and this is very common with nail guns.

Give your home a fresh start with a new roof installation.

One of the best things you can do to add lasting value to your home is to install a new roof. Rest easy knowing your home, and its resale value, is secure for years to come

There’s no time like the present to choose Sheegog Contracting for your new roof installation.

Depending on the product you choose, your new roof can last several decades

Superior Process With Accountability

Every roofing project is assigned a dedicated project manager to guide you through every step of the process. We’ll review choices, provide you with options, and back our work with a warranty.

Family Owned and Operated

Contracting is family owned and made up of local homeowners just like you. As our customer you’ll always know what to expect and can rest assured you’ll get the highest quality service at the right price.

Contracting’s team of local roofing professionals can complete your project with ease.

Roof replacement

Roof installation

Roof repair

Storm damage

Commercial roofing

Best Practices for Metal Roof Installation

When it comes to durability and energy efficiency, there is no better option than metal shingle roofs and standing seam metal roofs. There is a huge demand for them because of this. Those who install metal roofs are in high demand. It’s good to brush up on the best practices for metal roof installation so that you can ensure the best possible roof for your customers. Here are a few things to keep in mind.

Use Top Notch Equipment

As you install the metal roof, you need to ensure that all of the equipment you are using is specifically made for the roof panels that you are installing. If you are looking for high quality fasteners, snips, clips, or more, have a look around our site. We feature only the highest quality equipment and tools for metal roofers.

Hiring the Right Roofers

You’ll want to ensure that everyone working on the metal roof is properly trained for the job they are doing. Installing a metal roof is not a simple process, and it’s essential that anyone involved knows exactly what they are doing. When doing the hiring, make sure you hire those who have enough experience for the job at hand. There are even some roofing manufacturers that will offer installation training for roofers to take advantage of.

Using the Right Hand Tools

As you know, after your metal panels are in place, metal clips are used to secure them. They are spaced according to engineering and construction needs. Hand benders and seamers are then typically used in the process of installation. It’s important to ensure that your roofer pays particular attention to this part. Improper hand-tooling is the most usual cause of a leaky metal roof, caused by faulty installation.

The most crucial things to consider when installing a metal roof is the quality of the tools and equipment that are used and the knowledge and skills of the roofer. If you are looking for quality metal roof installation professionals, there are many places you can turn to. For example, you can look into local apprenticeships or co-op work term opportunities. You can also get your current employees to refer other employees to you. The possibilities are endless

THINGS TO CONTEMPLATE BEFORE A NEW ROOF INSTALLATION

Roof Ventilation

In order to ensure the longevity of your new roof, you need proper ventilation. Having good ventilation will also improve attic temperatures and lessen moisture retention during the winter. Ridge vents and gables can be included in roof replacements.

Energy Efficiency

While wanting everything to look great is okay, energy efficiency could save you money. Roof inspections have shown that materials that don’t absorb heat easily are better at keeping your home cool. The right materials for roof replacements could lead residents to more substantial savings in the long run.

Gutter Maintenance

Choosing a gutter that is seamless helps residents to avoid emergency roof repairs. If you choose a gutter which requires eaves or gable overhangs, you’re setting yourself up for a potential problem. Water leaking will cause an emergency roof repair residents.

Chimney Cap

Chimney caps are not often thought of, even though they are very cost effective. Their purpose is to help a home retain heat and keep precipitation out. It also keeps rodents outside. When you are receiving a roof inspection, ask the professionals about a chimney cap.

Eave Flashings

If you are looking for the final touch on your roof replacement, contemplate installing eave flashings. A weatherproof eave flashing does not allow moisture to reach the shingles.

Cockroaches Control Services For You

Ways To Prevent Cockroaches In Your Home

Like it or not, homes and business properties are ideal breeding grounds for certain species of cockroaches. With plenty of food, warmth, water and nesting sites, these formidable pests can remain active all year round.

You might see cockroaches in a variety of places in your home: pipe holes, sinks, fridges, cupboards, wall cracks, boxes or bins. Nobody likes to see them scurrying around. However, many people regard them as nothing more than a harmless embarrassment. In fact, although cockroaches do not cause diseases themselves, they are a danger to you and your food and do spread germs and bacteria.

Preventing Cockroach Infestation

Eliminate food sources – The most effective way to deter cockroaches is to deny them food, water and shelter. To get rid of them, get rid of what sustains them –

  • Do not leave liquids in sinks or buckets
  • Do not leave food sitting out on counters
  • Store dry foods in tightly sealed containers
  • Rinse cans, bottles and plastics before putting them in recycling bins
  • Empty the rubbish on a daily basis

Clean – Clear all waste food and liquid spillage, cleaning up food debris from food preparation areas, under sinks and appliances. Remove pet food, drink and litter trays before nightfall.

De-clutter – Cockroaches release an aggregation pheromone in their droppings telling others they have found a safe harborage. Remove old stacks of newspapers and magazines, unused cardboard boxes and all other forms of clutter from the floor or bottom of cupboards where these pests have easy access.

Regular maintenance

Regular maintenance will prevent cockroaches from getting into your home and reduce access to hiding spots.

Pipes and Drains – As already stated, cockroaches are quite fond of damp and moist areas. Because of this when it comes to your home or business they can usually be found near pipes and drains. Regularly checking this area for signs of cockroaches and taking the necessary procedures such as repairing damaged pipes and clearing blocked drains is a good cockroach prevention measure.

Shelves – The cracks in the grains of wooden shelving provide a great hiding spot for cockroaches. Paint or varnish wooden shelves to seal these cracks and crevices. Alternatively, consider replacing your wooden shelves with plastic or metal shelves.

Seal entrances – There are number of places around a property that give cockroaches an easy way in. These are:

  • Walls
  • Skirting boards
  • Electrical sockets
  • Under kitchen sinks and bathroom cabinets

Check these areas for cracks and crevices and be sure to seal any that you find.

Health risks of cockroaches

The species of cockroaches that infest our homes are indoor pests that share a close association with humans, feeding on our food and waste. They are serious public health pests and are known to spread germs and illnesses through contamination, meaning everything a cockroach touches has the potential to make you ill. There are a number of very serious health risks that can be attributed to the presence of cockroaches, most of which are associated with food poisoning:

  • Salmonella: Cockroaches spread the salmonella bacteria which can be potentially life threatening. Symptoms normally go away within 4-7 days with no treatment, but in some cases the contraction of salmonella can lead to severe dehydration and hospitalisation.
  • E. Coli: Cockroaches spread E. Coli, another bacteria responsible for food poisoning which can be life threatening.
  • Asthma: The faeces of cockroaches can trigger an allergic reaction in people who suffer from asthma.

HOW TO ELIMINATE COCKROACHES

IDENTIFY PROBLEM AREAS WITH FLASHLIGHT AND GLUE STRIPS

When considering what cockroach control method to use, it is best to first examine your home for possible roach infestation sites. Do this by using a flashlight to search popular roach hiding spots, including behind the refrigerator, under the sink, crevices in cabinets and shelves, closet door corners, bathroom cabinets and closets.

Use roach glue strips to locate large infestations. Based on your flashlight inspection, decide on the most strategic areas to place strips. Monitor those areas for a few days to a week. Strips in high-traffic areas will catch the most roaches, and these areas will need the most treatment.

USE CAULK TO CLOSE GAPS TO PREVENT FURTHER INFESTATION

Traps can be effective in reducing existing roach populations, but they won’t get rid of roaches on the outside trying to break in. To prevent a roach infestation from expanding, use caulk to fill possible entry points, including gaps between walls or tile, small crevices and entry holes. It will also help to use weather stripping on doors and window seals.

PLACE GEL BAIT BAIT STATIONS TO EFFECTIVELY REDUCE ROACH POPULATION

Gel bait can be an effective roach killer. Gel bait usually comes in the form of a tube and can be applied under baseboards, in cracks and crevices, and near areas that are most likely to attract roaches. While gel bait can be effective in getting rid of roaches, it can also result in a number of dead roaches lying around your home.

Another popular method when deciding how to kill cockroaches is the use of bait stations. Bait stations work by attracting roaches into stations to feed on poison. The poisoned roach then travels back to its home location, dies and is eaten by the other roaches, further passing on the poison. Bait stations work partially to get rid of roaches, but do not target all roaches in a home. They also pose an issue because they contain poison and look unappealing when scattered around your home. Some roach hotels only contain glue to trap the roaches, not bait and poison them.

BORIC ACID POWDER FOR ADDED EFFECTIVENESS

Boric acid, a substance found in products like clothing detergent and toothpaste, can be one of the best roach killers. Unfortunately, it is also easily misapplied and subject to displacement by air currents, sending the material into areas where children and pets can come into contact with it. Made by chemically combining boron and water, boric acid is low in toxicity to people and pets but deadly to cockroaches. When used incorrectly, boric acid will lose effectiveness and is not typically recommended as the sole method for getting rid of cockroaches.

Best Ways to Prevent Pest Infestation

How can I keep my home pest free? What is the best way to prevent a pest infestation? Perhaps become common questions that every homeowners need the answers.

When in fact, the best way to control any pest infestation is to prevent it from happening. Below are some preventive actions needed to prevent the pests from invading to your home. Let’s find out!

Clean the home regularly

Since most of the home pests are attracted and comfortable to stay in dirty and unhygienic environment, so cleaning the home regularly are the best way to prevent a pest infestation at home. Any fallen food crumbs and spill of sugary drinks on the floor are undoubtedly attracting pest like cockroach or ants to come in instant. Therefore, cleaning activities such as sweeping, mopping and vacuum cleaning are surely become the easiest thing you can do at home to keep your home clean and pest-free.

Best ways to prevent: ants and cockroaches

Repair all leaking pipes

Plumbing and pest control have a lot more in common than you ever imagine! The leaking pipes at home are leading cause of many pest infestation. Leaky pipes offer standing water to rats, ants and cockroach.

On other hand, termites and leaking pipes are closely linked due to termites fondness for moist living environments. Ensure to fix all leaking pipes at home and actively monitor any erosion or leakages.

Best ways to prevent: ants, cockroaches, rats and termites

Seal up all cracks

Any crevices and holesAny crevices, cracks and holes provide entry points for pests. Even the tiniest of cracks can create possible entries for these pests that are capable of squeezing through. Ants, cockroaches, bed bugs, and rats just need 1 cm to enter your home! Therefore always remember to seal all cracks and crevices by using a caulk to seal up any joints or plaster and patch holes on walls and concrete.

Best ways to prevent: ants, cockroaches and bed bugs

Storage food safely and properly

Places in which food is kept should be absolutely pest-free! Your kitchen and pantry are the place where pests such as ants and cockroaches often take up refuge to find their source of food. Make sure you don’t leave any food out and store it in food safe containers with locking lids stop the movement of these pests approaching to your food.

Best ways to prevent: ants and cockroaches

Choosing The Perfect Wedding Videographer For Your Special Day

Things you should be asking your wedding videographer.

Thinking about having a wedding videographer at your wedding? Great! Here are a few questions you should be asking those behind the camera. For brides and grooms, weddings are a blur. Having a wedding video can make a world of difference. when you’re looking back and reminiscing about your big day.

We often hear from brides, that the reason they got a wedding videographer was because someone close had mentioned that they regretted not having a wedding film made. Simple things like, how did I move in my dress? Did the groom cry? The details we spent hours deciding on. If a photo tells a thousand words, a film tells a million

Their experience as a team

First. What does the team look like? A make or break for films is the rapport of the crew. The first question, how long has the team been working together? But also, how long have they been filming weddings for? Weddings are different, they’re one take wonders, no re-takes no repeats. So it’s important you have a crew that comfortable with each other.

Reviews

A sign of a good wedding videographer is the way their previous couples talk out them. Do they have any reviews? If they do, things to look out for are. How emotive the review is, does it mention things like “it made me cry”? If it does, that really is the difference between a wedding videographer taking the time to create an emotive, provocative and personal wedding film versus one that simply follows a template and gets it out.

Timeframes

A wedding video just doesn’t happen overnight, it takes a lot of work crafting a wedding film that personalised and unique to the couple. Wedding videos take between six weeks and 6 months to produce and there’s a reason for this. Crafting a story, especially in film takes much longer than the time it takes to deliver photographs. From finding the right music to colour grading the footage everything takes a bit of time and it rightly should. It’s your video and it should be perfect. So, the third question to ask is, how long will it take to deliver my wedding video?

Should I hire a wedding videographer?

Tossing up whether or not to hire a wedding videographer? You’re not the first couple. Here’s the thing – it’s a given that almost everyone generally hires a photographer for their day, but videography often seems like an afterthought. Something that would be nice, but isn’t an essential.

Well, neither are flowers. Or professional hair and makeup. Or even rings (it’s true).  Beyond having an authorised marriage celebrant make things official (and of course, two willing participants), nothing is essential at a wedding. But for whatever reason, videography is often questioned.

One of the founders didn’t have videography and one of them did. And guess who feels like they came out on top? Not the former. Yes, it would’ve stretched the already broken budget (which is the reason why she didn’t go for it) but long after the day has passed and dress is packed away and the good times are a happy yet increasingly fuzzy set of memories, some footage of it all would be really nice. And it would last the test of time.

We’ve enlisted the help of the fantastic wedding filmmakers from The Story of Us to answer all your burning questions around pricing, drone footage, music etc. and to provide some clarity around the arguments for and against wedding films.

I’d like to just generally know more about videography for my wedding. Why have a wedding film?

Wedding films by no means replace photography but together they enhance each other and have completely different purposes for capturing your memories. It’s the same as any story; think of your favourite movie. Looking at beautiful stills of the movie and watching the movie are very different experiences.

wedding Videography tips for Brides

It’s your wedding day! Your dreams of the perfect day have come to fruition. Now the only task at hand is capturing these very special moments on your wedding video. Wedding videos like wedding photos last for lifetimes so it is important to always know what you want and what you are getting.

Apart from actually hiring your wedding videography and photography team there are some steps that you as the bride or groom can take to ensure that everything you want captured, will be. We have compiled a small list that details what videographers will need to fully capture your love story.

Find YOUR style of video

It’s always good to watch different wedding videos  with different styles of videography to be inspired for your own wedding film. There are many different styles to choose from. Do you want your wedding video to look more like a music video, or a short film with an element of storytelling?

Give time to your video and photo team in your wedding Timeline

Having a sufficient amount of time in your wedding day for couple portraits is key to creating a wonderful wedding film. It allows videography and photography teams to get the shots needed to create your beautiful love story without the disturbance of the craziness of the day. If you would like to see what a videographer and a photographer’s ideal timeline looks like click here

Hire your wedding photographers and videographers from the same company

Team work makes the dream work! It’s always great to have a team working together, rather than two different vendors who have their own different styles and visions. Getting a video and photo team that have worked together for awhile allows the team to create wedding photos and wedding videos that match in style.

Every Question You Need To Ask Your Wedding Videographer

If you’re anything like us, you have a serious weakness for beautiful wedding films. (And like us, you may even low-key weep over your laptop every time you watch one). Nothing captures the emotion of a wedding day quite like a fine art film, and you will love reliving yours—and sharing it with your family– for years to come. But when it comes time to inquire with a videographer, how do you even know which questions to ask? We’ve got you covered, with every question you need to ask your videographer, and insights from some of the industry’s finest filmmakers! Start imagining the slow-motion video intro of your dreams NOW

“Why is video so important?”

We can’t emphasize it enough: as time passes, your wedding video will become more and more meaningful. Little keepsakes can bring back wedding memories, but there is nothing quite as emotional—quite as transporting—as video. When you meet with your videographer, ask them to explain why their art form is so important, and why you will treasure your video for years to come

“What should I budget for videography?”

Before you meet with your videographer, pricing may be the biggest unknown. As with any fine art wedding service, it takes a little education to fully understand pricing for videography, so don’t be too shy to ask your vendor about their approach. According to Lindsay of NST Pictures, “Your video budget should be roughly the same as your photo budget. We often see couples with half the budget or less left for video because they feel it’s less important than photos. We understand that, but it does take the same amount of work as photography: coordination of details before the wedding, two experienced videographers running around for 8-10 hours, top-of-the-line equipment and hours of editing your final films and footage.”

“What sets your work apart?”

According to Julie of Elysium Productions, the number one question she wishes brides and grooms would ask is “what makes you stand out from other studios?” This question is so great because it gives your videographer the space to articulate her process and style, to speak with freedom and discuss her philosophy. In a sea of beautiful options, you want to know what makes your videographer unique—and if her work has that intangible ‘something’ you’re looking for. Look for any electricity—any spark, any connection you feel to your videographer’s words and work. While “couples should look for quality of picture and sound,”says Chris of Zen Film Works, the most important thing is “if the films wow them or move them emotionally.”  If you feel that indescribable, magnetic pull, then you’ll know you are “onto a winner.”

“I’d love to hear more about your career path! Can you tell me more about your wedding experience?”

When meeting with any videographer, you’ll want to assess whether they have the ability to create the wedding film of your dreams. Ask questions about how long the videographer has been in the industry and how many weddings they’ve done. Pay attention to whether they respond to your questions with tangible examples from their portfolio. This kind of deep experience and skill set will make all the difference, and will give you complete confidence in your investment. “Experience is key,” agrees Lindsay of NST Pictures. “You will keep your wedding video for the rest of your life so you want to look for a company that has a great track record. Read reviews, look for awards and see if they have any notable past clients.” Be mindful also that with this rich experience comes a (justifiably) higher price tag.

Wedding videography

Wedding videography can trace its roots back to before the invention of the modern video camera through 8mm and 16mm films. When film was the only way to capture moving pictures, a few enterprising individuals would take the family 8mm camera and film the weddings of friends and family. These film cameras had a major limitation in the form of 4-minute load times. After exposing 4 minutes of film, the operator would have to load a new film cartridge. The high cost of processing and the fact the majority of them could not record sound to the film further limited the industry. However, there were still a few individuals who were able to turn the documentation of weddings into a business.

The early days of professional wedding videography were marked by primitive technology and technique, with the equipment generally producing low image quality. Cameras required bright lights, had fuzzy pictures, poor color saturation, and single-channel, poor quality audio. The cameras were bulky, with a separate unit that connected to the video recorder via a cable, severely limiting the videographer’s movement. In post-production, many wedding videos were not edited. Generation loss was also a limiting factor because of the nature of analog video tape.

In the late 1980s and early 1990s, the state of the industry began to improve. Videographers began to form regional and national organizations, the largest, currently active organization being the Wedding and Event Videographers Association International (WEVA). Manufacturers created a market between the professional video camera and video camera consumer levels, known as the prosumer, which met the needs of this niche market. Towards the mid-1990s, the manufacturers introduced digital cameras, removing the last of the technological barriers that had impeded wedding videography since it was established. The cameras were small, mobile, worked even better than the already good analog cameras on the market in low light situations, and allowed the videographer to be discreet and not an intrusion to the events.

Post-production creativity took a major leap forward with the introduction of advanced tools like the Newtek Video Toaster in the early 1990s. This led to the introduction of other relatively inexpensive non-linear editing systems (NLE), which offered the editor many more creative options. But the delivery method still relied on an analog viewing system, VHS video tape. This changed in the late 1990s with introduction of the recordable DVD. Weddings and events were now recorded digitally, edited digitally, and delivered digitally, greatly improving the image quality.

By the late 1990s, wedding videography had expanded beyond documentation of weddings. The majority of wedding videographers preferred to add the additional term of “event” to their description of service. New offerings, such as Love Stories, Photo Montages (a retrospective collection of photographs set to music), music videos, family biographies, anniversaries, Bar and Bat Mitzvahs, graduations, and many other one-time events were also being documented in large numbers on video. The general skill level of the industry’s members improved and post-production capabilities reflected the standards of commercial productions.

How Do Accountant Differ?

A Restaurant Chart of Accounts: Food, Assets and Expenses

Restaurant owners, especially when considering food and other appreciable assets, need to customize their accounting software’s so that it shows an accurate chart of accounts. Note that, in relation to a chart of accounts, each restaurant handles the matter of food differently. There are three main ways to list food on a chart of accounts.

List Food as a Simple Asset

The first, and by far the most common, way to list food is as a simple asset. This is the least accurate method for determining profit and waste, but it is often the most streamlined. A restaurant owner simply adds all the food expenditures for the month or accounting period and lists the cumulative sum as a single expense. This method is fast but doesn’t account for waste and spoilage. In this scenario, the restaurant owner liaisons with the executive chef, making that person directly responsible for excessive food waste.

Most small restaurants operate this way because the approximation of waste is more cost-effective than tasking its monitoring day-to-day.

Listing Food as an Operating Expense

The second way to list food on the chart of accounts is, as previously mentioned, by monitoring waste, listing it as an operating expense directly under food expenditures. For small-scale operations, this method isn’t popular because it takes time away from cooks, who are often spread thin already to keep wages low. The smaller restaurants that keep their books this way typically only deduct exceptional waste items like caviar, steak, cheese, etc.

This method, as the scale of the operation increases, becomes increasingly more common. There are variations, such as calculating median waste vs. purchase by weight, but those levels of monitoring are usually only seen in large-scale production facilities and fast-food chains.

Listing Food by Category

The third is separating perishable and nonperishable items on the ledger. Then it is just a matter of listing food into two categories, and deducting perishable waste only. This method can be time efficient and relatively accurate, but it doesn’t take into account the loss of nonperishable items. An example would be listing a bottle of truffle oil as a nonperishable, but after three months the oil goes rancid, and 30 percent of the bottle is thrown away.

Chart Of Accounts

Chart of Accounts is the term your accountant uses to describe the buckets used to categorize the money that flows in and out of your business.

The Chart of Accounts includes assets, liabilities, revenue, expenses, and equity.

Then all of these are broken down into subcategories… things like marketing, restaurant supplies, and sales are all items you would typically find in a restaurant Chart of Accounts.

Why you should care…

The Chart of Accounts is the source of a business’s financial statements.

Without it, getting insights into anything related to your restaurant’s moneymaking & spending will be a headache… and getting your taxes done will be especially difficult.

Types of Chart of Accounts

There are three types of Chart of Accounts

  1. Operating chart of accounts: They are used to post daily expenses. The accounts in Operating Chart of Accounts could be either expense or revenue accounts, and the information is shared by Finance as well as Controlling modules.
  2. Group Chart of Accounts: These are accounts used by the entire corporate group. They help in generating reports at the corporate
  3. Country-specific chart of accounts: This Chart Of Accounts help meet country-specific legal requirements

How to Use Your Chart Of Accounts

You’ve set up all of your accounts, now what?

There are a couple of ways you can successfully use your chart of accounts.

1. Stay On Top Of Your Money

One of the main purposes of a chart of accounts is to break down where your money is coming from. Take the Sales Account for example.

Your chart of accounts will show you a current balance of your sales. If you’re using a software like Xero, you can click on the balance for more detail. The software will then show you every transaction goes into the total balance.

2. Know What You Owe

In the same way that you can view sales details, you can also understand how much you owe and why.

When you select the accounts payable balance, you can see the outstanding invoices you have received from vendors, but have not yet paid. This level of detail will help you stay on top of bills and expenses.

3. Track Assets

A good chart of accounts will help you keep all of your assets together. This is important because assets are a key in creating the balance sheet, which is critical to keeping the books balanced. 

In this account, Computer Equipment is a fixed asset. When the balance is expanded in accounting software, you can see all of the bills attached to that asset and the corresponding payments. With some software, like QuickBooks, you can create a subaccount under each asset to track the asset depreciation.

4. Fill Out Your Tax Forms

A proper, up-to-date chart of accounts is an efficiency lifesaver come tax season. 

Expert Tips

No one knows a chart of accounts better than certified accountants and bookkeeping experts. That’s why we’ve had these CPAs share some of their top setup tips. These nuggets of wisdom are incredibly helpful for getting your business started on the right track.

How do you handle bookkeeping for a restaurant? 5 Easy Steps!

1. Record Sales Through Your POS Daily

One of the first items you will have to figure out is how to properly record your sales. Sfst

Many find using QuickBooks for restaurants is an effective recording system.

  • Record Your Sales Entries Per Day

Record a separate daily sales entry for each day (not monthly or weekly). With this method, your are mimicking how the cash and credit card deposits hit the restaurant’s bank.Most restaurants accept credit cards and settle the batch on a daily basis. This will result in a credit card deposit or deposits hitting your bank account separately for each batch. You need to analyze how funds are hitting your bank and set up your restaurant bookkeeping system to mirror that activity.

  • Generate a Sales Report

In order to record the daily sales you will need to generate some sort of report that summarizes your sales. Most restaurant POS systems will have a daily sales summary built into them. If you need to customize the report to get more detailed information you will need to work through the customization with your POS system.

  • Create a Daily Sales Journal

Once you have a sales summary you should set up a daily sales journal entry and create a memorized transaction in QuickBooks.

2. Handling Accounts Payable

The next step of your restaurant bookkeeping process should be to set up accounts payable. Keeping your vendors happy will be important if you want them to continue to do business with you.

  • To start, learn how to enter bills and pay bills in QuickBooks; both are easy tasks to accomplish.
  • Enter your bills 1-2 times per week and pay them once per week.
  • If you are cutting checks for your bills you want to make sure to print checks from QuickBooks. This will automatically feed the payment information into your QuickBooks file, thus reducing unnecessary data entry.
  • Another option is to pay your bills with online bill payment by linking your bank account to QuickBooks and signing up for online bill pay. 

Pro Tip: Another part of your accounts payable will be setting up a credit card in QuickBooks. I have seen many users set up credit cards incorrectly in QuickBooks. A credit card should not be set up as an expense type account; it should be set up as a credit card type. Your expenses are recognized as you enter credit card charges. Setting up a credit card with the correct type will also allow you to reconcile the account, which is very important.

3. Payroll

As a business owner, you are at major risk by doing your own payroll. If you incorrectly file your payroll taxes or file them late, the penalties and interest you will be assessed can be quite large. You are held at a high level of liability if you do not outsource your payroll to an accounting firm.

Outsourcing your payroll is surprisingly affordable and a necessary option to ensure consistent and reliable paychecks and accounting.

Pro Tip: Look for a payroll company that is very reputable. Require the payroll data have the capabilities to be imported into QuickBooks and all reports and paychecks to be sent digitally.

4. Reconciliation

Reconciling QuickBooks accounts is the single most important piece of the entire bookkeeping process.

Reconciling your accounts is the only way to know that you have recorded all of your financial transactions. You need to reconcile all of your accounts not just your bank accounts. You should reconcile bank accounts, credit cards, loans, lines of credit and payroll liabilities. Any account that gets a statement with a beginning and ending balance can be reconciled. Account reconciliation ensures that you are looking at accurate financial reports.

5. Financial Reporting

If you are not using financial reporting for your restaurant, then you are running your business blind. With such tight profit margins in the restaurant industry it is important to analyze your financial reports on a regular basis.

Restaurants should be looking at sales vs. cost of goods sold ratios as well as labor ratios. Another ratio many restaurants should consider is the prime cost, which aims to keep cost of food + beverage + labor at roughly 60% to 65% of your total sales.

New Electric Circuits Testing Regulations

Useful Revit Tricks Every Electrical Engineer Should Know

This is a guest post by electrical engineer and Revit expert Dillon Mitchell. As you’ll see, Dillon has a lot of experience with Revit and has learned a bunch of tricks that help him work smarter and faster. In this post, he shares five of his best tips

When I first started using Revit, I found the software to be overwhelming. First, there are all those buttons and options. Second, everything was wide open. It seemed that with Revit, if you can imagine it, you can create it. It’s a powerful tool but it can also be intimidating.

Getting started took some effort and I tried to learn just one piece of the software at a time. In a way, I found Revit to be a lot like Excel – there are deeper and deeper levels to it. Yet I made progress learning the software by starting on the surface and mastering the basics.

Set Your Load Classifications

Load classification in Revit segments your loads into different classifications. These classifications will be put on your panel schedules and are useful when filling out utility letters at the end of a project. The utility company uses this information to size the transformer at the service entrance. Typically, this information takes a long time to collect; you need to add up all the receptacle loads, lighting loads, largest motor, as well as heating and cooling loads. When done throughout the course of the project, this information is simple to provide.

Understand Type vs. Instance Properties

Revit has two kinds of parameters; type parameters and instance parameters. Understanding when and where to use each kind of parameter is critical for an efficient workflow.

House Wiring for Beginners

In a typical new town house wiring system, we have:

Live & Neutral tails from the electricity meter to the CU

A split load CU

Ring circuits from 32A MCBs in the CU supplying mains sockets. 2 such rings is typical for a 2 up 2 down, larger houses have more.

Radial lighting circuits from 6A CU MCBs. 2 or more circuits typical.

Earth connection from incomer to CU.

10mm² Main equipotential bond to other incoming metal services (gas, water, oil)

Earthing

Earthing is a fundamental safety system used in electrical installations. It works in co-ordination with circuit breakers MCBs, Fuses, and RCDs to ensure that an electrical supply can be disconnected quickly in the event of a fault. This greatly reduces shock risk.

Residual Current Devices (RCD)

The 17th Edition of the wiring regulations impose more frequent requirements to install RCD (or RCBO) protection than the previous 16th Edition. In general, ANY cable which is buried less than 50mm below a wall’s surface AND is NOT mechanically protected, or wired in one of a number of specialised cable types that incorporate an earthed screen must have 30mA trip RCD protection. Such circuit protection may be derived from either an RCD protecting several circuits, or individual RCD/RCBOs on each circuit.

RCBOs

An RCBO is a combined RCD and MCB in one module, and is fitted in place of an MCB. RCBOs allow individual circuits to be protected by their own RCD without any risk that a fault in an unrelated circuit could cause it to trip. However protecting all circuits like this is more expensive.

Neutral Connections & RCDs

Neutrals for circuits protected by different RCDs (or those from an RCD and non RCD protected circuit) must not be mixed. If any neutral wire is connected to the wrong side, the RCD will trip. The same principle is true for RCBOs, each RCBOed circuit needs to have its neutral connected to the RCBO neutral and not elsewhere.

tips to prevent electrical fires at home

Electrical fires can do some serious damage to your home and put your family’s safety at risk. The good news is electrical fires are often preventable

Keep heat-producing appliances unplugged when not in use. When heat-generating appliances malfunction or are accidentally left on for an extended period of time, they can overheat and catch on fire. It’s safest to unplug kettles, curling wands, toasters, irons, and other “hot” appliances when you’re not using them.

Only use extension cords temporarily. Extension cords should be used as temporary solutions only. If you need additional permanent power sources installed in your home, contact a qualified electrician

Never cut off the third prong on a power cord. The third prong (also known as the “ground”) is there for a reason: to protect you in the event of a power surge or other electrical malfunction. If your home only has two-prong outlets, consider having an electrician inspect your home’s electrical system to see if they can update your outlets to three-prong ones.

Update your home’s electrical system. Knob-and-tube wiring, aluminum wiring, and 60-amp electrical systems (commonly found in older homes) tend to come with a greater risk of overheating. Consider upgrading to an electrical system that uses modern wiring materials (like copper, for example) and has at least 100 amps to reduce your chances of an electrical fire

Tips to Draw Your Next Schematic Design Like a Pro

Ready for that next great idea for a PCB project? It’s all starts with your schematic design. Unlike a PCB layout, which is all about the physical placement of parts and copper, a schematic is more theoretical, describing how components are electrically connected. And while you won’t necessarily know how parts physically connect when drawing a schematic, you will know exactly how a signal will move through your circuit. Sounds easy enough, right? Not so fast.

Clearly Show How Your Wires Connect

You’ll be relying on wires to define connections between symbols on your schematic drawing. In Autodesk EAGLE you’ll see these referred to as nets. Regardless of what you call them, there are several guidelines to keep in mind.

Complete Net Connections When It Makes Sense

The entire goal with a schematic is to make your circuitry as easy as possible to understand when you read it in the future or hand it off to another engineer. To aid with this process of readability, it’s necessary to minimize any unnecessary net connections when they aren’t needed.

Always Use the Same Symbol for the Same Device

If this is your first schematic drawing, then you might be surprised to know that there are several different ways you can draw schematic symbols. This all depends on what side of the world you’re living in, and what standard you plan to follow

Make Sure Every Part Has a Unique Designator

This is another tip to enhance the consistency and readability of your schematic. Every symbol on your circuit needs to have its own unique designator so that every part is easily identifiable. For example, every resistor should follow a consistent naming sequence of R1, R2, R3, etc.

Earthing And Bonding

Why do earthing and bonding need to be checked?

If you are having an alteration of addition made to your electrical installation, your electrician must check (as well as other things) that the earthing and bonding arrangements you have are up to the required standard.

What is earthing?

If there is a fault in your electrical installation you could get an electric shock if you touch a live metal part. This is because the electricity may use your body as a path from the live part to the earth part.

Earthing is used to protect you from an electric shock. It does this by providing a path (a protective conductor) for a fault current to flow to earth. It also causes the protective device (either a circuit-breaker or fuse) to switch off the electric current to the circuit that has the fault.

What is bonding?

Bonding is used to reduce the risk of electric shocks to anyone who may touch two separate metal parts when there is a fault somewhere in the supply of electrical installation. By connecting bonding conductors between particular parts, it reduces the voltage there might have been.

More advice

An electrician will give you advice if your earthing or bonding needs to be improved for safety reasons. We strongly recommend that you use an electrician registered with a government approved scheme to carry out any electrical installation work you need doing.

How Buying Commercial Truck Tires Can Save You Money

SEnuke: Ready for action

Commercial truck tires should be chosen carefully because they are used on trucks that tend to be in businesses or commercial purposes. For those who have truckers exert extra effort in the quest to find the right ones for their trucks. Extremely tip ever when it comes to buying commercial truck tires is to get information all out and spend more for the best tires. You might realize odd to advice one to buy expensive truck tires and tell you that you may save money doing so, yet it’s possible. Here’s why:

Buying quality tires you will save money general health last longer and are definitely durable than inexpensive added wheels. This means you do not need to keep buying new tires every time inferior tires break reduce. Buying more often is more expensive than buying expensive ones now and still not buying again for years after who seem to.

Inferior tires may be cheaper the moment it breaks down, it will cost you greater buying expensive tires in the first place. Commercial trucks often carry important loads and need to truck breaks down, you will Nextroad D79 possibly not be capable of making that important delivery, thus, making you lose money and clients as now. This would be bad for business which enable it to make you lose more than the associated with expensive automotive tires. Quality tires can enhance the performance of the truck that will make deliveries on time or even earlier.

Expensive truck tires may well your travel smoother that has better treads. Quality tires have better rolling resistance as a result you lessen the use of acceleration whilst traveling time, you save funds fuel too. Remember that fuel prices are very unpredictable and capital on fuel is every driver’s dream come genuine.

But it isn’t enough for quality and expensive tires for this commercial trucks. You have to take good your commercial truck tires as better. Doing so will make them last a lot longer. You have to make sure they are properly inflated at all times. If you feel a little slack, pump them immediately to avoid accidents. Check your tires regularly for any wear and tear. Remove objects that can have stuck during approaching prevent them from getting buried bigger. Commercial truck tires are in order to understand purchase nowadays especially with the help of the internet. You can find great deals online and compare prices and features at your own home.